Settings Pages
Table of Contents
CC-PLUS operates using three separate entities:
- Users: people who can log in and use the web-based interface
- Providers: organizations who publish harvestable COUNTER R5 reports
- Institutions: organizations who gather statistics from Providers
Institutions are further described by
- Groups: user-defined sets of 2 or more Institutions
Each of these entities need to be set-up in order to use the system. All of the controls for setting up and managing these entities are available under the “Settings” option in the main navigation menu.
Although they are listed as above in the drop-down, when initially setting up the system, Providers must be set up first, then institutions, then users. Instructions for setting up all of these using the bulk upload option are found in Process for initial ingest of settings.
Providers
“Providers” is the term CC-PLUS uses for an entity supplying data through a COUNTER report retrieved via a SUSHI request. These may be vendors, platforms, publishers etc.
The list of providers includes:
- Provider name: the locally defined name assigned to the provider
- Status: active or inactive (inactive is used to remove a provider from active harvesting, since providers can not be deleted from the system while data still remains in the database.)
- Institutions served: the institutions that can harvest from this provider
- Harvest Day: the day of the month data is harvested.

New providers can be added in bulk through the import function described in Process for initial ingest of settings, or one at a time using the “Create A Provider” button. SUSHI settings for combinations of providers and institutions can also be uploaded on this page or through the Institution page. Again, see Process for initial ingest settings for more details.
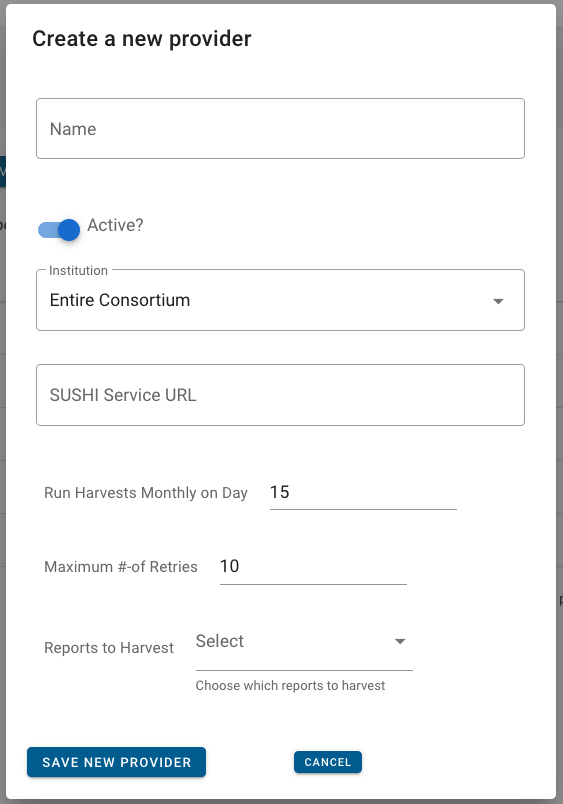
New providers must be given a name and a URL for the SUSHI service. The institution drop-down indicates which institutions may connect to that provider. The default is to connect to the entire consortium. Individual institutions only need to be selected if the provider should not be available to some institutions To actually initiate harvesting, we will later need to add credentials.
You may also choose a day of the month that automated harvests will occur. The default is set to 15. The maximum number of times a report will attempt to be harvested if the request fails can also be set. The default number is set to 10.
You must choose which of the four types of COUNTER reports to harvest from the provider. CC-PLUS will harvest full master reports, which can later be customized to correspond to the various COUNTER-determined views. The report types are:
- Title Reports (TR)
- Platform Reports (PR)
- Database Reports (DR)
- Item Reports (IR) You can find more information about what these reports contain in the COUNTER R5 Code of Practice.
Finally, the provider must have a status. The default is for the provider to be active. Only active providers will show up in options to harvest reports. Once a provider is created and data is stored in the database, they cannot be deleted from the system (because data exists). If you no longer want to harvest data from that provider, you can then make them “inactive.”
If you click the name of a provider, you will be taken to a screen that shows more information about the provider:
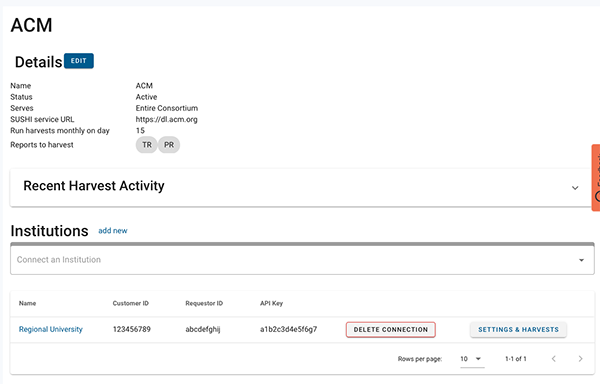
At the top of the page are the basic provider information created when you add them to the system. Underneath this is a collapsed list of recent harvests from this provider. Clicking the down arrow at the end of the line will open up the list. This will aggregate harvests across multiple institutions if you have permission to view their data.
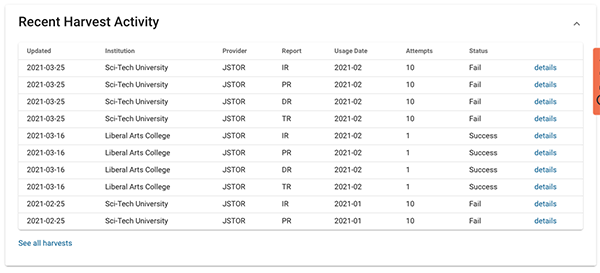
More information about the harvest log is available in Harvesting Reports.
Under the harvest activity is the list of institutions that have been connected to the provider for harvesting. A new connection can be made by selecting an institution from the drop-down list:

Once the institution is chosen a form will open up to add the customer ID, requestor ID, and API key credentials. Clicking connect will save the connection, and automated harvesting will begin on the next harvest date.
You may use the “Test Settings” button before connecting. This will send a request about whether or not the endpoint is responding. It may not however, test the actual settings you have entered. This is dependent on how the provider set up their endpoint. It is helpful if you are unsure whether the server location is correct. If it is not, it will have to be modified in the Provider’s record. Another way to test the actual credentials is to set up a manual harvest for one month’s worth of data. You can monitor the success of the harvest on the Harvest page.
In the list of existing connections, you can either delete the credentials, or open and edit them by clicking “Settings & Harvests”
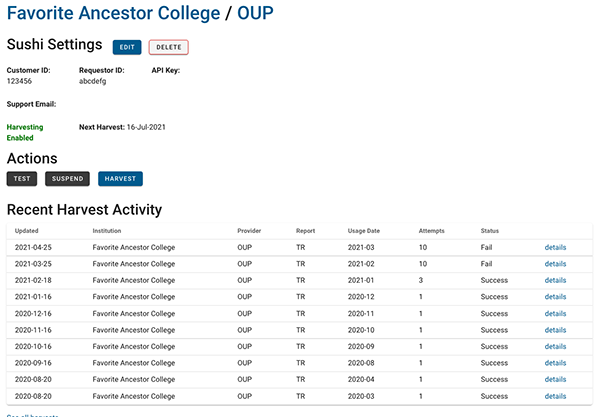
The resulting page will list the credentials, which are editable, and a list of the recent harvests for this specific provider and institution.
Institutions
Institutions are the other main entities involved in the CC-PLUS system.
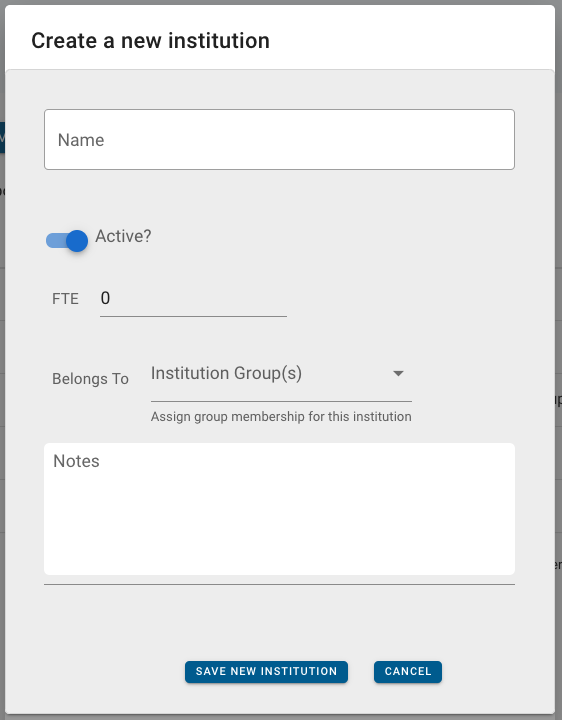
As with the other two entities, instructions to add institutions in bulk are found in Process for initial ingest of settings. They can be added individually by clicking “Create an Institution.”
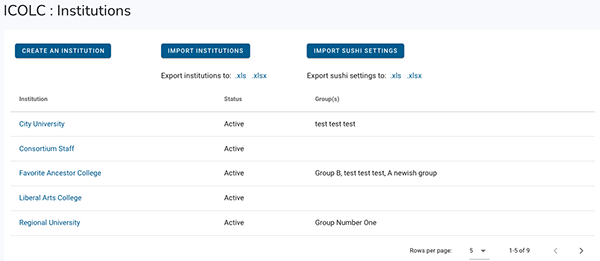
Institutions must have a name, and whether or not they are active or inactive. Like Providers, if data exists for the institution in the system it cannot be deleted and must be made “inactive” if you no longer wish to harvest data.
Institutions can further be optionally d0escribed with the number of FTE, membership in a group (also described further later), and an open note field.
New institutions are created either one at a time using the “Create New Institution” button or via the bulk import process. In the Institution settings multiple sets of SUSHI credentials can also be uploaded in bulk. Both processes are explained in the Process for initial ingest of settings page.
When clicking on a name in the Institution list, a page similar to that of the provider opens.
Again, the main details are listed at the top of the page and are editable. Additionally, for Manager and Admin users, the list of user accounts affiliated with the institution are listed and new user accounts can be added from this screen.
Similar to the Providers page, the Institution page also has a list of recent activity, and the credentials for various providers. New credentials can be set up by choosing the Provider from the drop-down list and adding the credentials as was done in the Provider example above.
Institution Groups
CC-PLUS allows for the creation of groups of institutions for quick access to data for multiple institutions. Groups can be composed of any combination of institutions, and institutions may be part of multiple groups. Creating a group can speed up the process of creating custom reports or doing harvests for data.
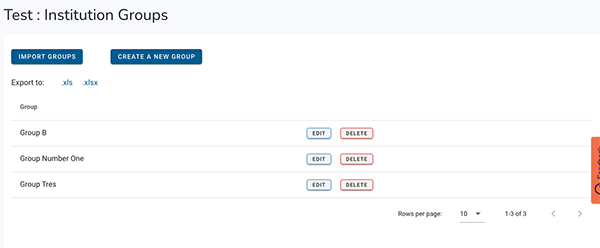
The groups list is very simple, with just name and buttons to edit or delete. Groups can be created or edited in bulk as with other settings (see the Process for initial ingest of settings for details). Creating a new group is a two-part process. First click the button to “Create a New Group.” A pop-up box will ask for the name of the new group.
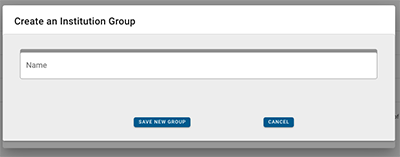
Once the name is saved, you will return to the list of groups. From there, you can choose to “Edit” the new group. Institutions can then be added or removed to the group in the next window.

Users
Finally, you can create user accounts for those who will be able to view and create reports in CC-PLUS. Each user has a User Name, Institution affiliation, Status of Active or Inactive, Email, Roles. The main user settings page lists all the active and inactive users of the system and the date of their last login.
User roles are as follows:
- Admin: can create and manage settings for all users, institutions, and providers
- Manager: can manage settings for their own institutions and can create and manage users within their institution
- User: can view statistics for their own institution
- Universal Viewer: can view statistics for all institutions
Roles other than Admin are meant to be used in combination. At a minimum all users must have at least the “userr” role. So Managers must also be either users or viewers in order to both see reports and manage settings. If you have a number of users you would like to add at once, See Process for initial ingest settings, under Part Four: User Accounts.
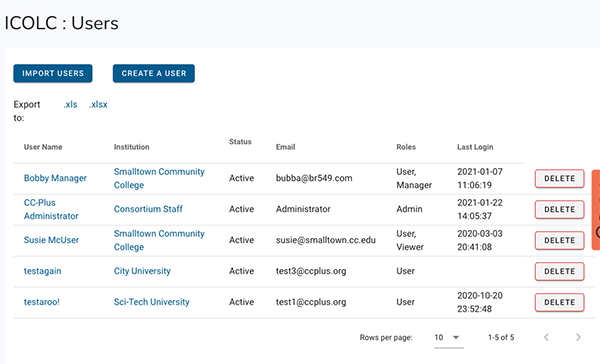
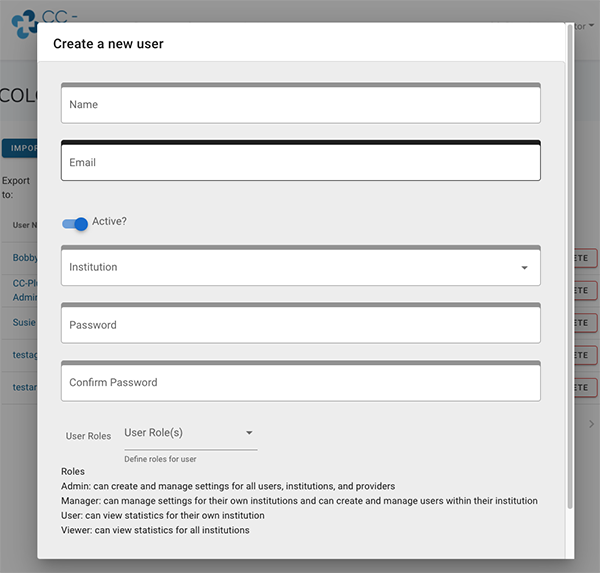
New users can be added in bulk through the import function described in the above mentioned document, or one at a time using the “Create A User” button.
The box that will pop-up when that option is used asks for the user name and email and a password. You must remember the initial password you create and share it with the user. Ask them to change the password upon login.
You must also assign the user to an existing institution and roles. These will be used to determine what data the user has access to. The default for a new user is to be set to active, although you can choose to create an inactive user if you would like. This might be most useful if a user is temporarily not using the system. Unlike the other settings, users can be deleted by an administrator from the main user settings page.
If any information for the user changes, it can be edited by an Admin account, or a Manager account (for other Managers and Users only). If a user forgets or loses their password, the password can be updated by the Admin or Manager or the user can click the “Forgot Password” button on the login screen to prompt an email with instructions for resetting the password.