Harvesting Reports
Table of Contents
Starting a Harvest Manually
When a connection is made between an institution and a provider, CC-PLUS will automatically harvest the specified reports on a monthly basis. However, there may be a need to manually harvest or re-harvest data during the initial set-up, or when data has been restated or fixed.
Instructions below are given for two types of users: Admins who can harvest data for multiple institutions, and Managers who can harvest only for their own institution
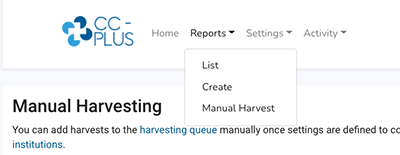
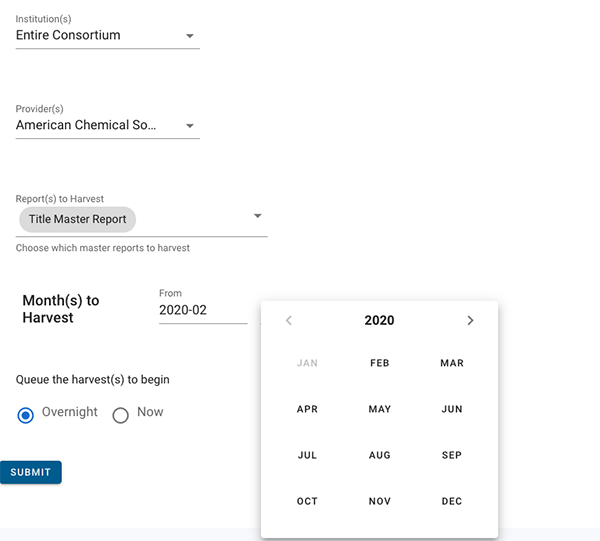
- Choose Reports -> Manual Harvest from the Main Navigation
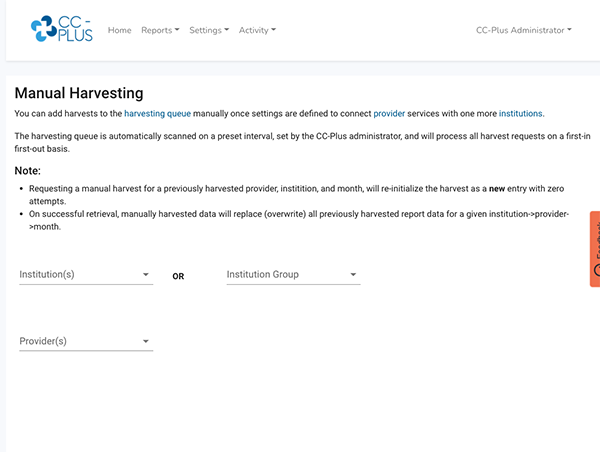
- Select the institution(s) or group(s) you want to harvest data for
- Admin users may select from all institutions, whereas Manager’s institution will be selected in the first field. Managers cannot harvest data for institutions other than their own
- Select the provider(s) you would like to harvest from
- Note: the options available in this drop-down and the next will reflect all the providers and report types it is possible to harvest. If you select more than one institution or a group, be aware that the provider or report you choose may only be harvestable for some but not all of the institutions.
- Note: the options available in this drop-down and the next will reflect all the providers and report types it is possible to harvest. If you select more than one institution or a group, be aware that the provider or report you choose may only be harvestable for some but not all of the institutions.
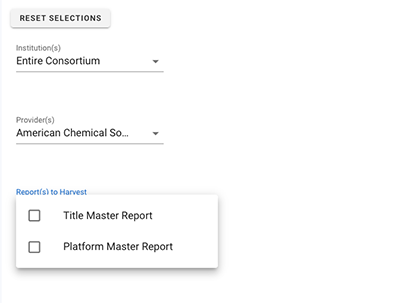
- Select the type of report you want to harvest
- Note: you may only harvest master reports. This ensures that the database is complete and able to create customized reports later. You will be able to select specific “views” when you retrieve reports.
- Choose the timeframe you want to harvest
- Choose whether you would like the harvest to begin immediately, or be queued to run overnight. Choosing immediate harvest, will put these harvests to the top of the queue ahead of any other harvests that are currently in process.
- Note: you may only harvest master reports. This ensures that the database is complete and able to create customized reports later. You will be able to select specific “views” when you retrieve reports.
- Hit the “Submit” button to begin the harvest. You should get a message that the harvests have been added to the queue.
- To monitor the status of the harvest(s), go to Activity -> Harvests in the Main Navigation. You will see a list of harvests starting with the newest.
Monitoring Harvest Progress
The Harvest log is found by clicking “Activity -> Harvests” in the main navigation. On this page, monthly harvests of data are represented in a single line. A “harvest” may be attempted up to 10 times to account for typical issues and delays with providers who publish data.
The line for each harvest lists:
- the date of the latest attempt
- the institution
- the provider
- report type to be harvested
- the month that the harvested data reflects
- the number of attempts undertaken
- the status
- a button to go to a page with more detail about that harvest attempt
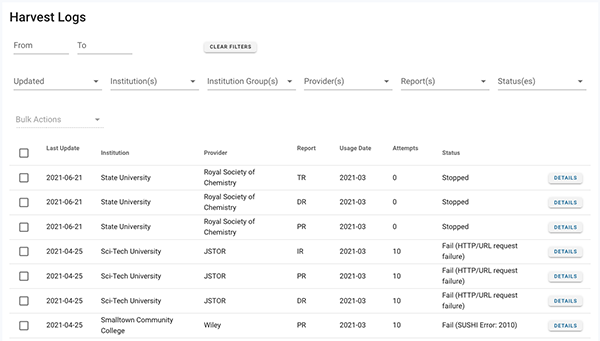
The harvest log can be filtered using the drop-downs at the top of the list. Clicking checkboxes beside each harvest enables the “Bulk Actions” drop-down to affect them. Using this drop-down, you can stop, restart, or delete a harvest.
The Status drop-down lists the following harvest statuses:
- Success: the harvest has completed successfully
- Fail: the harvest failed after 10 retries
- New: the harvest job has been created, but has not yet been put in queue
- Queued: the harvest is in queue to run after currently active harvests or harvests queued ahead of it
- Active: the harvest is currently running
- Pending: the harvest is paused, typically because of a request to wait at the endpoint
- Stopped: the harvest has been stopped manually by the user
- ReQueued: the harvest has been attempted 1 or more times unsuccessfully and has been put back in the queue to try again
On each harvest line in the log, a failure will also include a brief description of what the last error message was. More information about harvests, including error messages can be found by clicking the “Details” button. This will open a new page with the specifics of that harvest:
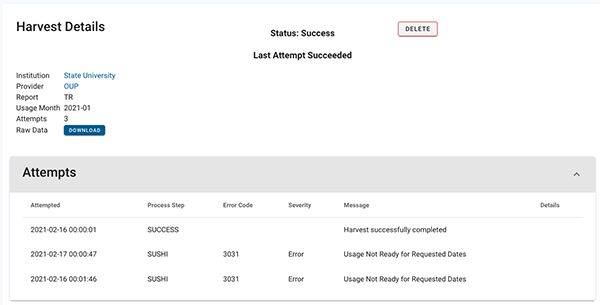
From this page you can see the result of each attempt to harvest the monthly report. The status of the last attempt is displayed at the top of the page. If the last attempt was unsuccessful, the error message is displayed. Clicking on the question mark next to the message will pop-up a further explanation of the error and a suggested solution:
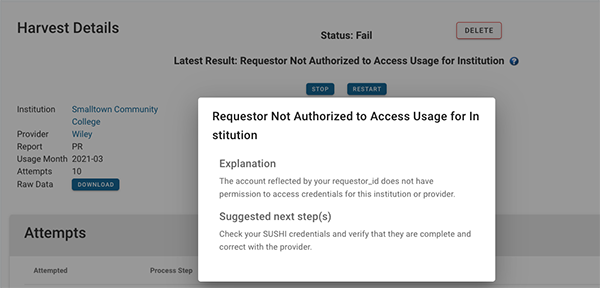
You can also see the error by downloading the Raw Data in JSON and viewing it in a browser. A full list of errors and suggested actions is available here.
If the error is not something that can be fixed before the next attempt, you can press the “stop” button to stop the harvest process. Once an issue has been fixed, returning to this page and pressing “restart” will put the harvest back in the queue for harvesting.
Versions of the harvest log are also available on the Institution and Provider settings pages, limited to the last 10 harvests for the institution or provider in question. A link at the bottom of those lists leads back to the main harvest log page with those options pre-selected in the filters at the top of the page.
Failed Harvest Alerts
The other sub-page under “Activity” is Alerts. These occur when a harvest attempt fails 10 times. In addition to being listed in the harvest log with the status “Failed”, these harvests will also be listed on the Alerts page:
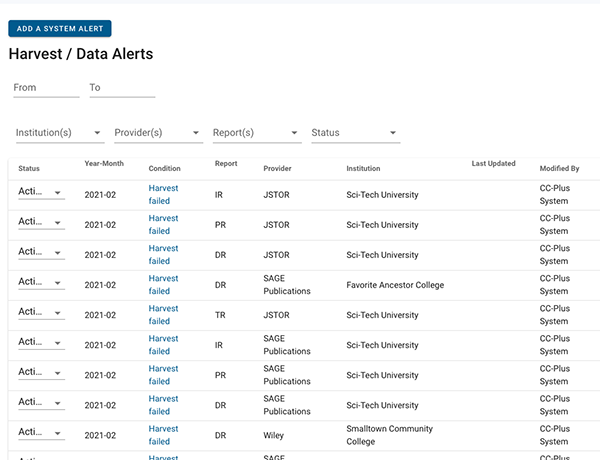
The alerts page is similar to the harvest log, listing the month and year of the report , the type of report, provider, and institution. The details page (the same page as that described above in Harvest Details), is linked from the “Condition” link for each harvest. You can use this page to determine what the issue is with the harvest and potentially find a solution.
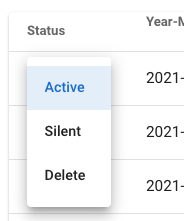
At the beginning of each line is a status. In this list “status” refers to whether or not you want to keep the alert active (i.e. on this list). By clicking the drop-down, you may also choose to “silence” the alert (keep it from the home page [NOTE: this is currently a bug and doesn’t work]), or delete it from this list.